Guide Detail
By Breezeblock & Nathaliee
Created Apr 9, 2026 / Updated May 8, 2026
Lairs are a sea expedition that can be spawned when fighting vampires at sea. They will naturally appear 4 days in 28 days (around the New Moon phase)— you can see which exact days they spawn by using a vampire calendar. The calendar will tell you when the peak day of vampires are active. However, 2 days before that, vampires will start spawning and the calendar will show vampires are out then. The first day only 1 vamp fray will be active on a random island and it has the longest cool down to spawn, the second day it can have 2 frays active and the cool down of spawning is a bit shorter. The third day, aka the peak day where the calendar is calibrated by, will have 3 frays active maximum and the cool down of spawning vamps is even shorter. The 4th day it will act the same as the first day. The recipe for the calendar can be acquired from a trading post for 25 vampire trinkets. This will not require any dubs to deliver and it is relatively cheap to get.
During those 4 days there are 2 ways to get the sea battles:
The reliquary acts like a BK compass and upon activation it will start the first vampire battle. The vampire sanctum (also called a ‘lair’) will spawn randomly after 1–3 battles. If you lose any of the sea battles the expedition will end.
When vampires are not active, you can obtain:
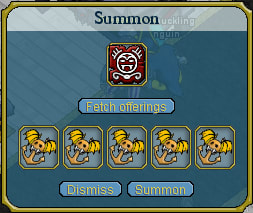
Using a vampire charm will summon a group of 5 vampires at the island you are currently on. However doing this will make the vampire mission appear on the notice board and it will be accessible to everyone who sees the mission.
If you want more privacy, you can also use the charm in a house with a summoning table. By doing this you can invite friends to do the fray to guarantee the reliquary for yourself. This will cost you 5 vampire trinkets to summon.
Summoning table can be bought at a furnisher once you have the summoning table design. To obtain the design for a vampire summoning table you need to trade in 50 vampire trinkets at the Trading Post. There may be a dub delivery cost for the item depending on the enamel color used.
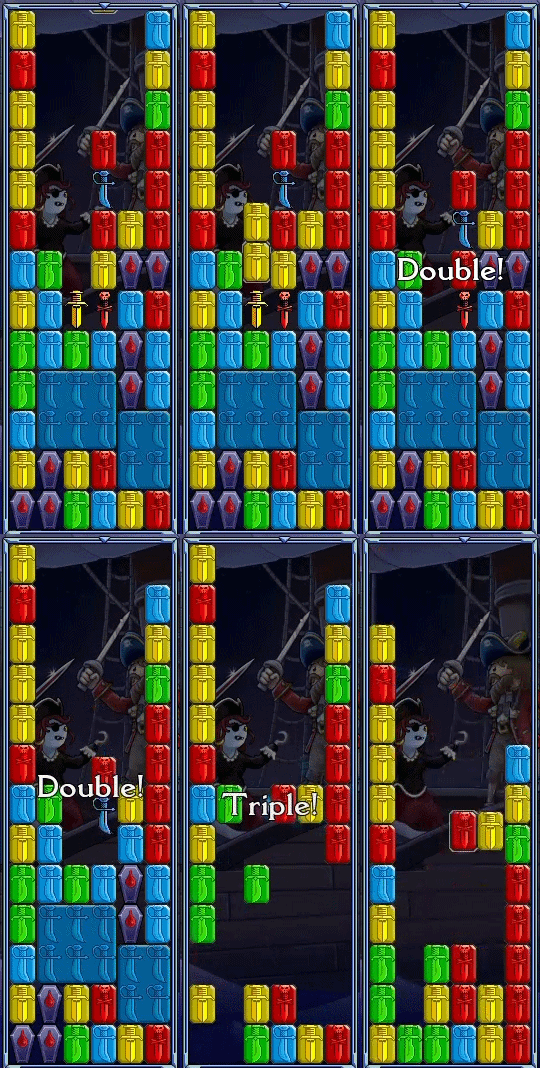
When you fight the vampires you will notice in SF that they will drop coffins on your board. To clear these you need to do a combo adjacent to the coffins. All coffins next to the second part of the combo will clear — the first clear or pre-double will not clear any coffins.
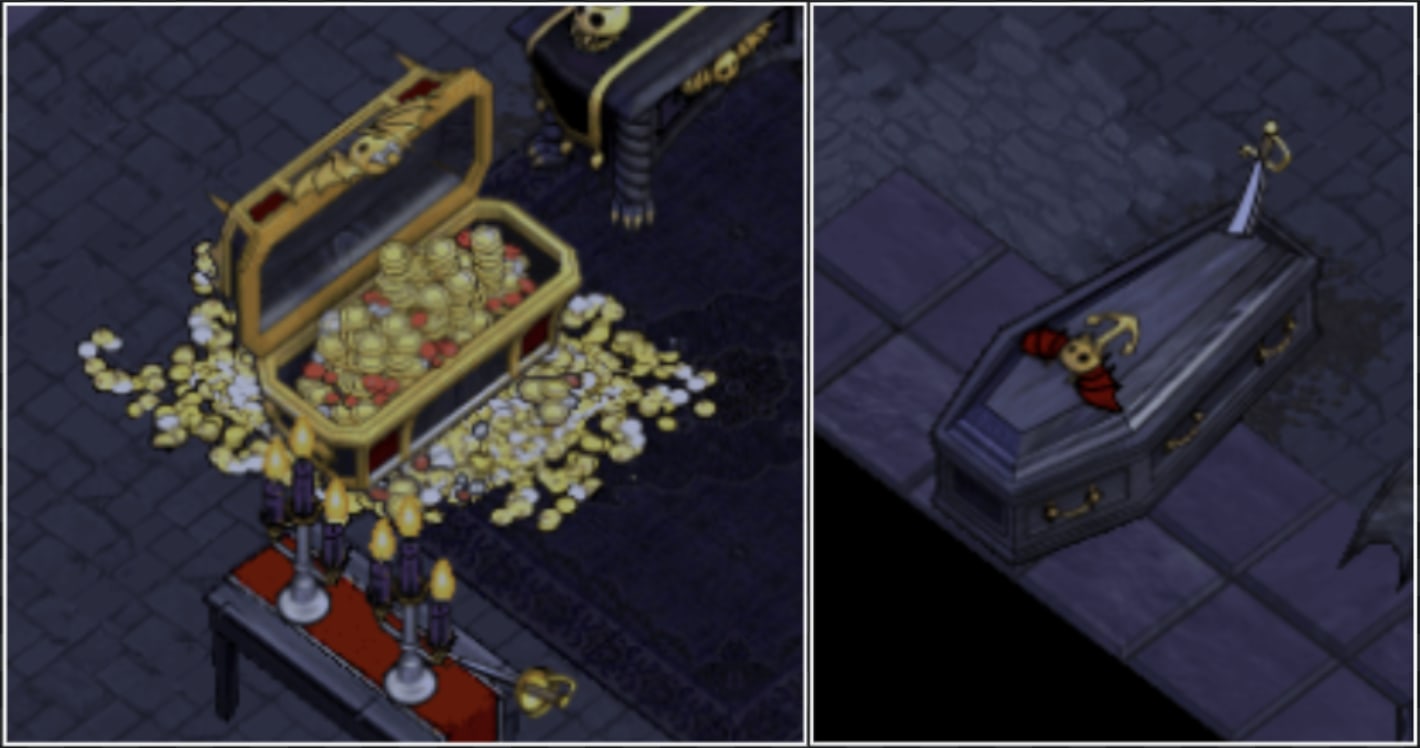
In the lair there will be 2 stations:
Vampire count will increase in numbers after each fray.
It is advised to not use a reliquary randomly on any route — you can manipulate the spawn of the lair.
Emerald Ocean: The easiest method is at Aimuari Island, charting to Quetzal. Take the battles close to Aimuari while having the ship bow facing Quetzal.
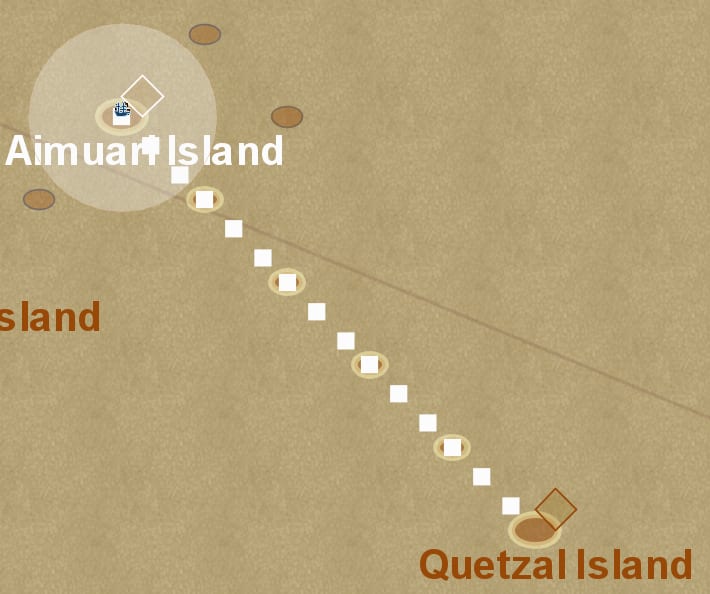
Other Oceans: There is no route that makes the lair spawn at the island directly. You can spawn the lair behind you by charting through a route that has no chart. To identify these routes, use Mantid's maps and look for a thin dotted line. If you activate the reliquary at the waypoint and follow the non-chart route, the lair will always spawn behind you.
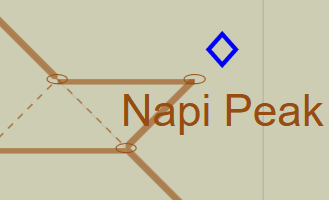
Charted Route:
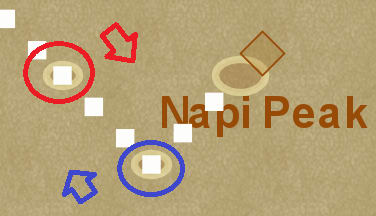
The images above give an example of how you can do this set up at multiple points at the ocean. In the second image it shows what way your ship should be facing when you are at the LP. Take the battles as close to the LP as possible it will spawn behind you.
Ship choice: You can use any ship to spawn a lair — the vampires will match your ship. However, a cutter is personally advised; it is the easiest to set up and if you fill it with pirates the strategy is not too complicated. When stacking a large number of lairs, cutter is best as it can hold more treasure.
Warning Do not set ship mode to evading. Doing so will make you lose the reliquary. For example, you win battle #1, second ship spawn, ship is set to evade, you engage ship #2, then once that battle is won, you will not spawn the sanctum, same with the third battle.
When stacking lairs, do not divvy until all lairs are completed. Doing so would lose all remaining lairs.
When you stack lairs make sure to have space in the hold for the chests, you can port and get rid of stock if you have too much DO NOT divide the booty until all lairs are complete. If you divide all expo's will end.
Lairs will scale to the amount of people you enter with. If someone leaves midway it will still scale the same as the number you entered with. It is advised to enter with at least 4 people — if you enter with fewer, the lair will still scale as a 4 person one.
When you enter you have a small window to move around. It is best to position yourself closely to any of the treasure chests. After the first fray, stations will become active — the chests will become treasure haul stations and the coffins will become carpentry stations.
After the fray, the treasure haul and carpentry session will start. Every session will be 120 seconds long and you will get a warning in the chat when there's 15 seconds left. The warning will come with the following sound queue:
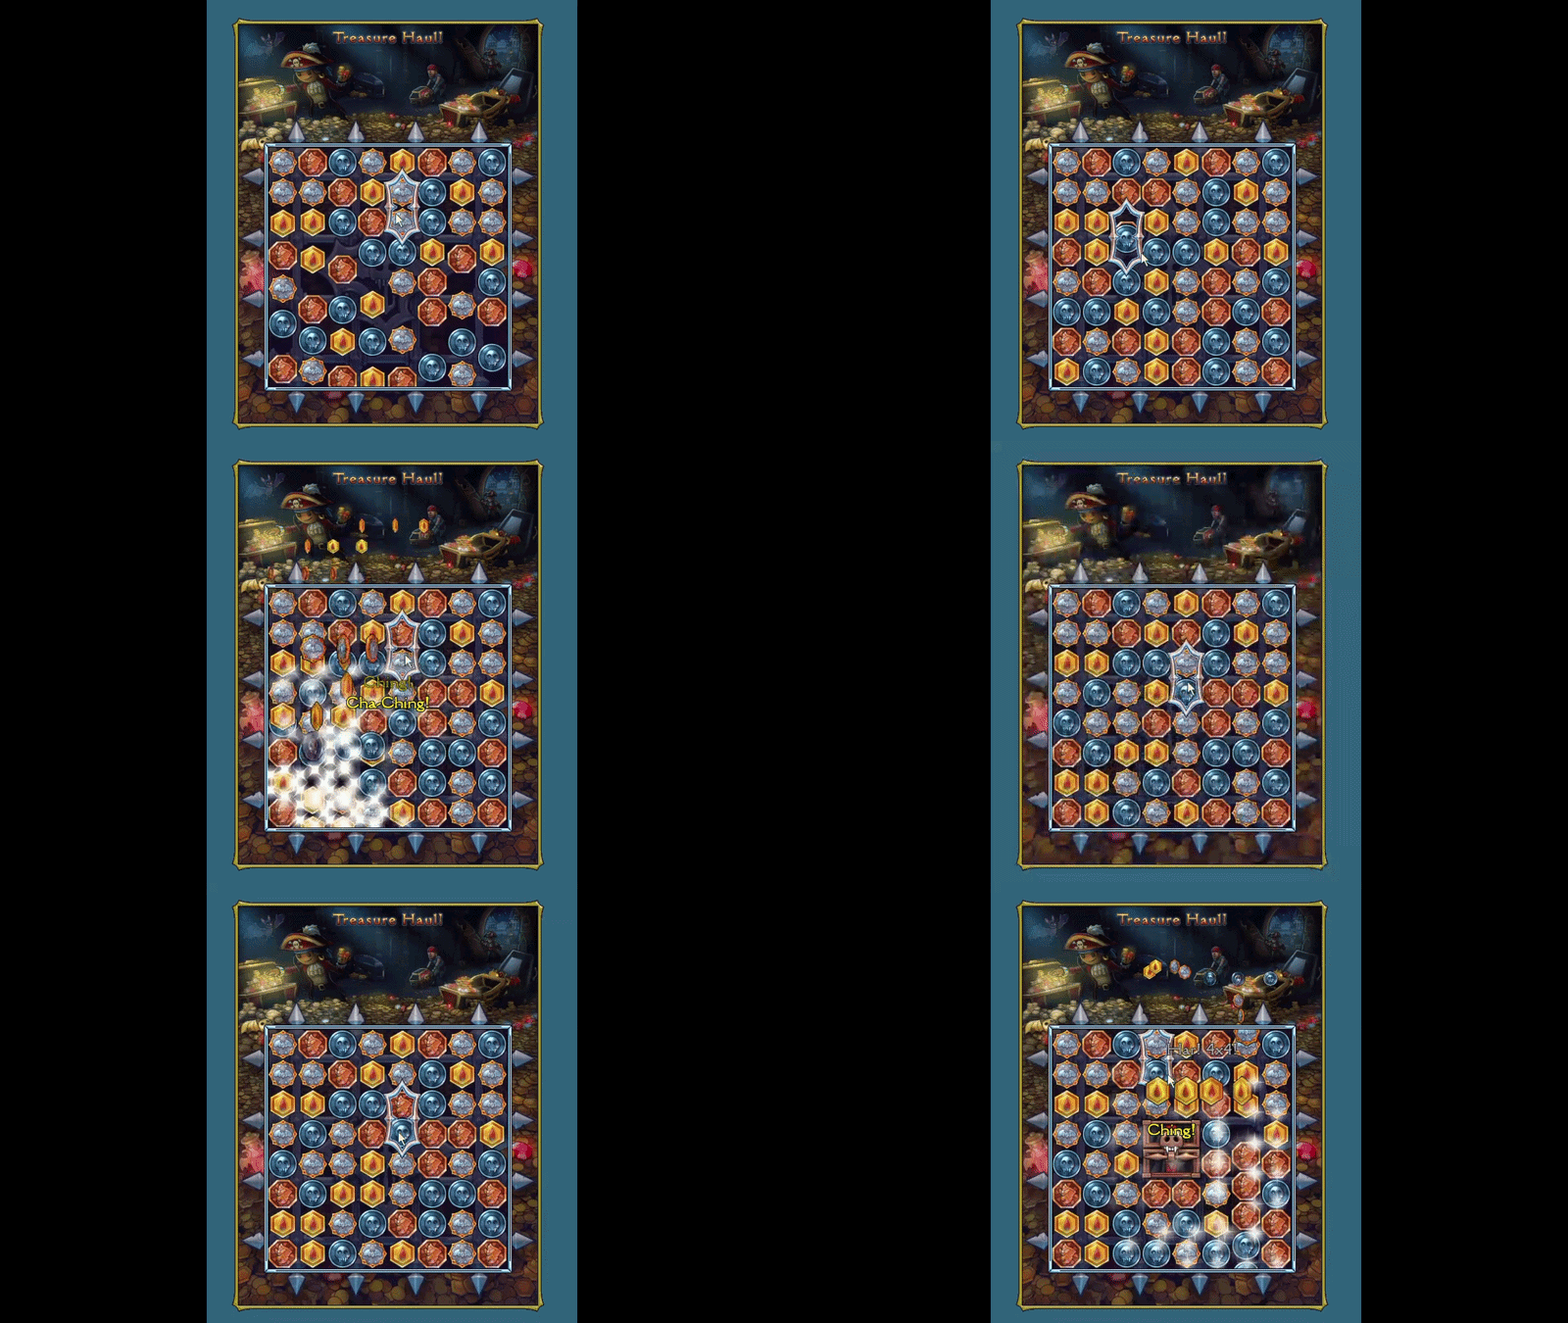
Treasure haul will have a different sprite palette than normal treasure haul. Coins do not matter at all in lairs — it is only about chests.
To get the very first chest to spawn you need to do a small clear and then wait a few seconds and do a 2×3 clear. After the chest spawns, the goal is to bring it all the way to the top of the screen. There can only be a maximum of 2 chests on screen at once.
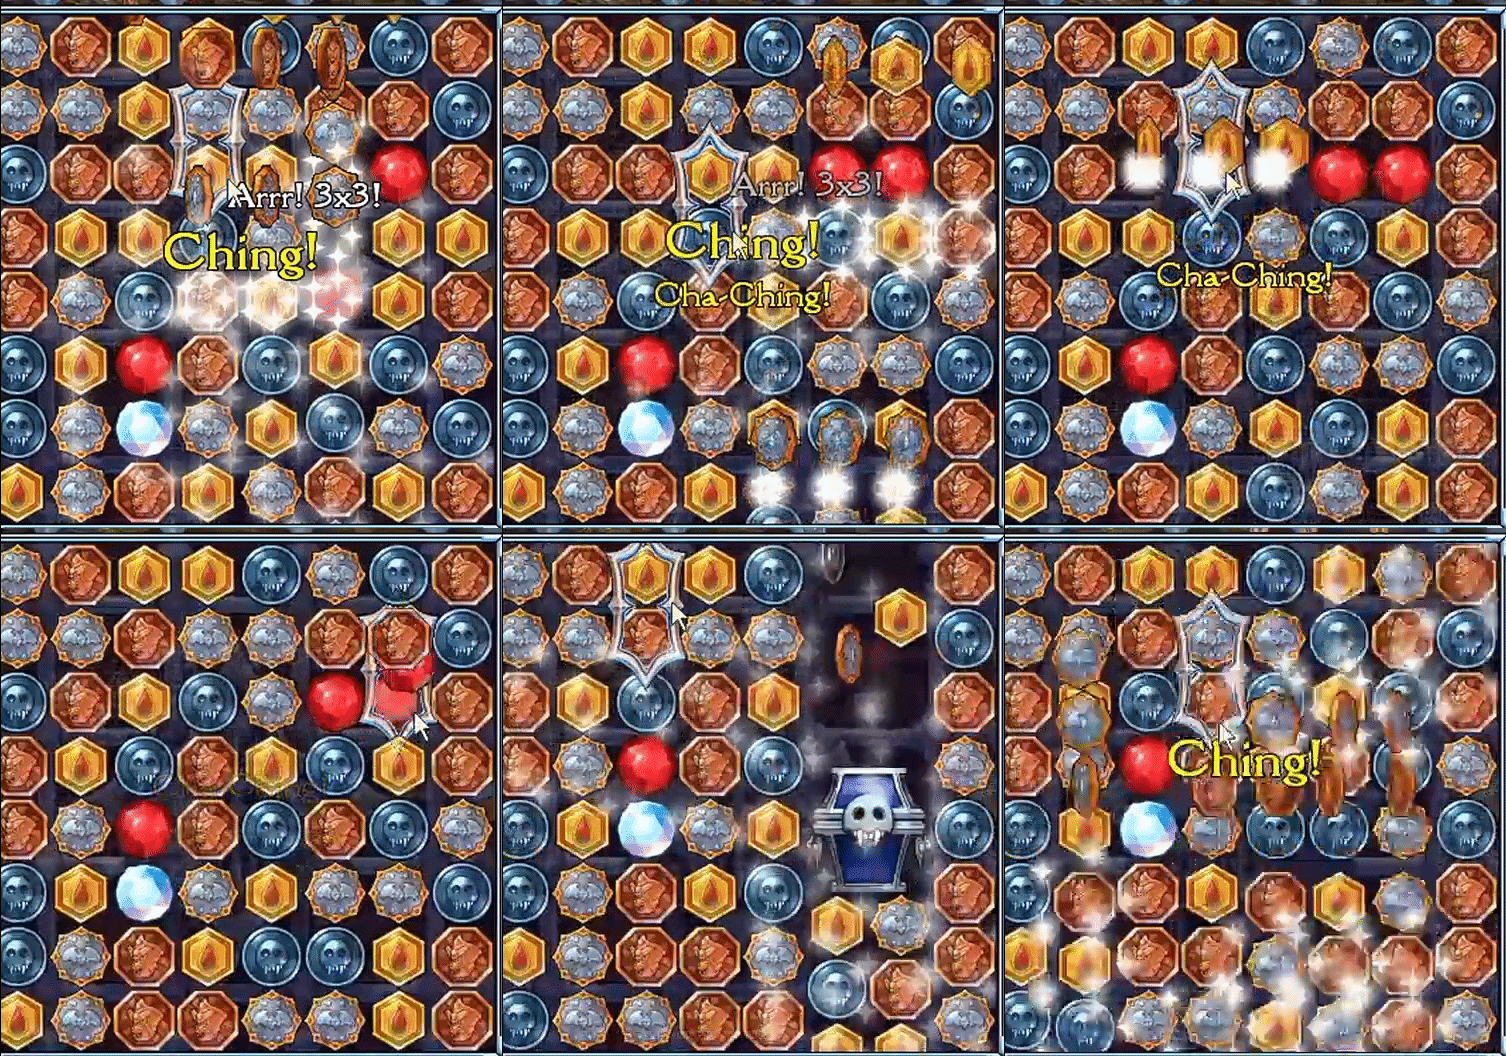
There are also gems that spawn — these will clear whole rows of coins and can be used to your advantage:
As a jobber you will by default do TH unless you volunteer for carp.
| Chests | Rating |
|---|---|
| 8+ | Frenetic |
| 6–7 | Swift |
| 5 | Brisk |
| 3–4 | Steady |
| 2 | Lethargic |
| 0–1 | Asleep |
The coffin station lets you enter the carpentry puzzle. Lair carp is a combination of speed and accuracy.
| Pieces Used | Result | Score |
|---|---|---|
| 5 pieces | Vampire Proof (Masterpiece) | +2 |
| 6 pieces | Creaky Coffin (Craftsmanship) | +1 |
| 7+ pieces | Slipshod | -1 |
For every 6 points, a vampire will be damaged by 50%.
When adding people to carp, people will generally say +(number of carpers wanted). When people volunteer make sure to confirm them by typing + their pirate name.
When you volunteer for carping, you stay carping until the captain or runner says "all haul" — do not switch by yourself in the middle as it will somewhat grief the run. When the captain/runner shouts all haul, go back to TH.
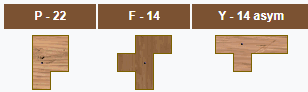
1 2 3 for picking up pieces — it will increase your carp speed a lot.| Points | Rating |
|---|---|
| 15+ | Frenetic |
| 12–14 | Steady |
| 9–11 | Brisk |
| 6–8 | Steady |
| 3–5 | Lethargic |
| 0–2 | Asleep |
Example of a high-level carpentry session, recorded by Nathaliee (Meridian)
After you add people to carpentry, you want to solo the damaged vampires. Make sure to let people know this — most people are somewhat experienced with lairs so they will know, but it is always good to remind.
The scaling of lairs is not linear but more exponential. The later the frays, the more carpers you want to add.
During the 7th fray, mother will become active. After this point they will add a lot more vampires than previous frays. While the battles after mother are doable with a good squad, it is advised to leave the sanctum after mother if you are not too experienced.
The table below represents how many vampires you can expect to face based on the fray number and amount of pirates on board.
| Fray | 4 Pirates | 5 Pirates | 6 Pirates | 7 Pirates | 12 Pirates | 18 Pirates | 30 Pirates | 45 Pirates | 75 Pirates | 159 Pirates |
|---|---|---|---|---|---|---|---|---|---|---|
| 1 | 4 | 5 | 6 | 7 | 12 | 18 | 30 | 45 | 75 | 159 |
| 2 | 4.8 | 6.0 | 7.2 | 8.4 | 14.40 | 21.6 | 36 | 54 | 90 | 190.8 |
| 3 | 5.76 | 7.2 | 8.64 | 10.08 | 17.28 | 25.92 | 43.20 | 64.80 | 108.0 | 229.0 |
| 4 | 6.91 | 8.64 | 10.37 | 12.10 | 20.74 | 31.10 | 51.84 | 77.76 | 129.6 | 274.8 |
| 5 | 8.29 | 10.37 | 12.44 | 14.52 | 24.88 | 37.32 | 62.21 | 93.31 | 155.5 | 329.7 |
| 6 | 9.95 | 12.44 | 14.93 | 17.42 | 29.86 | 44.79 | 74.65 | 112.0 | 186.6 | 395.6 |
| 7 | 11.94 | 14.93 | 17.92 | 20.90 | 35.83 | 53.75 | 89.58 | 134.4 | 223.9 | 474.8 |
| 8 | 14.33 | 17.92 | 21.50 | 25.08 | 43.00 | 64.50 | 107.5 | 161.2 | 268.7 | 569.7 |
| 9 | 17.20 | 21.50 | 25.80 | 30.10 | 51.60 | 77.40 | 129.0 | 193.5 | 322.5 | 683.7 |
| 10 | 20.64 | 25.80 | 30.96 | 36.12 | 61.92 | 92.88 | 154.8 | 232.2 | 387.0 | 820.4 |
| 11 | 24.77 | 30.96 | 37.15 | 43.34 | 74.30 | 111.5 | 185.8 | 278.6 | 464.4 | 984.5 |
| 12 | 29.72 | 37.15 | 44.58 | 52.01 | 89.16 | 133.7 | 222.9 | 334.4 | 557.3 | 1,181 |
| Fray | 8 Pirates | 9 Pirates | 10 Pirates | 11 Pirates | 13 Pirates | 14 Pirates | 15 Pirates | 16 Pirates | 17 Pirates | 19 Pirates | 20 Pirates |
|---|---|---|---|---|---|---|---|---|---|---|---|
| 1 | 8 | 9 | 10 | 11 | 13 | 14 | 15 | 16 | 17 | 19 | 20 |
| 2 | 9.6 | 10.8 | 12.0 | 13.2 | 15.6 | 16.8 | 18.0 | 19.2 | 20.4 | 22.8 | 24.0 |
| 3 | 11.52 | 12.96 | 14.4 | 15.84 | 18.72 | 20.16 | 21.6 | 23.04 | 24.48 | 27.36 | 28.8 |
| 4 | 13.82 | 15.55 | 17.28 | 19.01 | 22.46 | 24.19 | 25.92 | 27.65 | 29.38 | 32.83 | 34.56 |
| 5 | 16.59 | 18.66 | 20.74 | 22.81 | 26.96 | 29.03 | 31.10 | 33.18 | 35.25 | 39.40 | 41.47 |
| 6 | 19.91 | 22.39 | 24.88 | 27.37 | 32.35 | 34.84 | 37.32 | 39.81 | 42.30 | 47.28 | 49.77 |
| 7 | 23.89 | 26.87 | 29.86 | 32.85 | 38.82 | 41.80 | 44.79 | 47.78 | 50.76 | 56.73 | 59.72 |
| 8 | 28.67 | 32.25 | 35.83 | 39.41 | 46.58 | 50.16 | 53.75 | 57.33 | 60.91 | 68.08 | 71.66 |
| 9 | 34.40 | 38.70 | 43.00 | 47.30 | 55.90 | 60.20 | 64.50 | 68.80 | 73.10 | 81.70 | 86.00 |
| 10 | 41.28 | 46.44 | 51.60 | 56.76 | 67.08 | 72.24 | 77.40 | 82.56 | 87.72 | 98.04 | 103.20 |
| 11 | 49.53 | 55.73 | 61.92 | 68.11 | 80.49 | 86.68 | 92.88 | 99.07 | 105.26 | 117.64 | 123.83 |
| 12 | 59.44 | 66.87 | 74.30 | 81.73 | 96.59 | 104.02 | 111.45 | 118.88 | 126.31 | 141.17 | 148.60 |
Source: Table data is based on the vampire spreadsheet created by Jice on Puzzle Pirates.
To leave, press the "Return to Ship" button in the Ahoy tab — you can do this at any point during the fray or station portion. You will leave after the station portion no matter at what point you clicked it. Warning Do not press Return to Ship prematurely. If you press this before SF begins, you will return to the ship.
General carper distribution guidance:
The tables below serve as a starting baseline. Adjust the plan based on your crew’s swordfighting and carpentry skill levels.
Here's an example of a strategy you could use on a 12 pirate cutter run with pirates of varying skills.
| 12 person run | Fray 1 | Fray 2 | Fray 3 | Fray 4 | Fray 5 | Fray 6 | Fray 7 (Mother) | Fray 8 (risky) | Fray 9 (risky) |
|---|---|---|---|---|---|---|---|---|---|
| Estimated Vampires | 12 | 14 | 17 | 21 | 25 | 30 | 36 | 43 | 51 |
| Additional Carpers | 0 | 1 | 1 | 1 | 2 | 3 | retreat | ||
| Total Carpers | 1 | 2 | 3 | 5 | 8 |
Here's an example of a strategy you could use on a 12 pirate cutter run with pirates of higher skills.
| 12 person run | Fray 1 | Fray 2 | Fray 3 | Fray 4 | Fray 5 | Fray 6 | Fray 7 (Mother) | Fray 8 | Fray 9 |
|---|---|---|---|---|---|---|---|---|---|
| Estimated Vampires | 12 | 14 | 17 | 21 | 25 | 30 | 36 | 43 | 51 |
| Additional Carpers | 0 | 0 | 1 | 1 | 1 | 2 | 2 | 2/3 | |
| Total Carpers | 1 | 2 | 3 | 5 | 7 | 9/10 |
Vampire targeting:
When leaving (at mother):
When jobbing:
Use this guide as a baseline, and adjust strategy based on your crew and how the run is going.
| Term | Meaning |
|---|---|
+(number) | Asking for a carper. +1 = asking for 1 person to carp; +2 = 2 people, etc. |
| IC | Immortal Chest — the purple one. The most important chest since it is the only one that can contain a bat or other good goodies. |
This guide was created by:
Additional assets and data sources:
